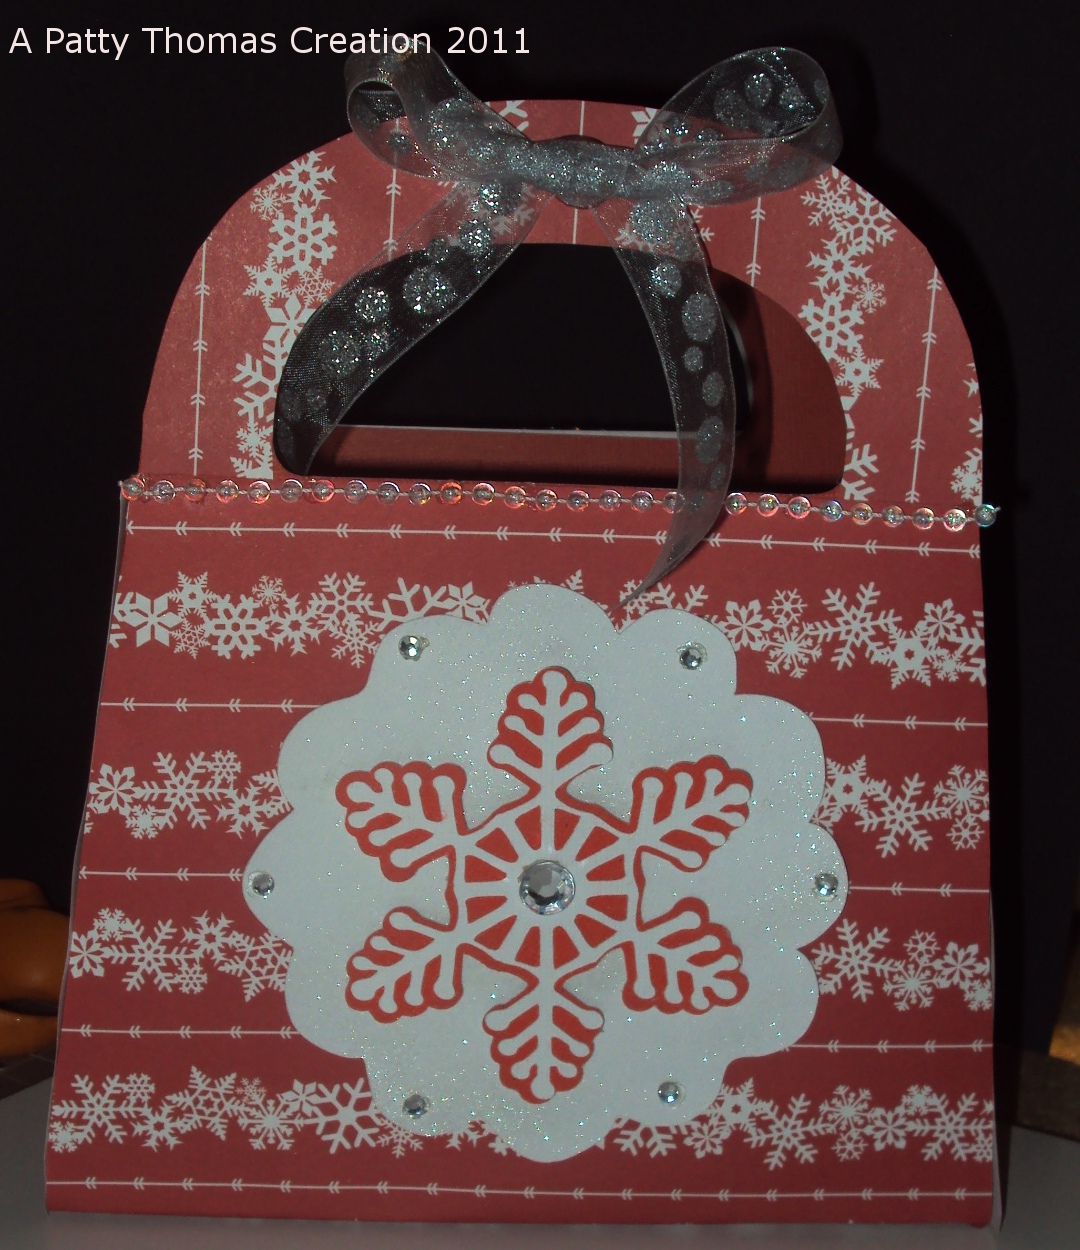
This week I've been busy working on some book reviews as part of my summer job, thus my cardmaking has gone slightly by the wayside. Last night and today I gave my self a break and sat down with my Cricut Gypsy. Back in the spring I took advantage of a deal to get seven free cartridges with the purchase of a Gypsy. One of those cartridges was Tags, Bags, Boxes, and More. I experimented last night making a couple of bags on the 12X12 mat. I just wasn't pleased with their tiny size. Perfect for a gift card or ring box, but not a sizeable bag. I rustled up some 12X24 paper and went to work this morning. The pictures show what I came up with. Using the larger paper and mat, my gift bag is now around 7 1/2 inches wide by 6 inches tall (8 1/2 with the handle). I found some wonderful plain "tag" cards in the dollar bin at Michael's and used one of those to create a matching card. I really like these tag cards. I always like to display my holiday cards and these have a prepunched hole perfect for hanging with ribbon or beads. Okay here's my "recipe" for the bag and card:
Bag:
I used one piece of red 12X24 cardstock from The Paper Studio cut at 22.75 X 11.58 (these sizes were created on my Gypsy). I then traced around the outside of the bag to put my snowflake pattern paper, from Recollections, in place. This also gave the bag a little more stability. Everything was put together using an Elmer's gluestick and Glue Dots to reinforce the bag seams. I embellished the outside by cutting a doily from the Cindyloo cartridge at 4.5 inches using white cardstock. I sprayed the white cardstock with sparkle Sheer Shimmer Spritz. I then cut a snowflake and background from the Winter Lace cartridge at 3.5 inches each. I added some sequins from Recollections and some bead trim and a bow. The bead trim was from RibbonFx and the ribbon from the Ribbon Boutique.
The Card:
As I've already mentioned, the card comes from Studio G. I adhered my snowflake patterned paper with a gluestick and then spritzed the exposed white area with sparkle Sheer Shimmer Spritz. I used Cindyloo again to cut a doily at 2.8 inches. Winter Lace provided me with the snowflake and background, cut at 1.8 and 2.1 inches respectively. I then added the same theme with the bead trim, ribbon, and sequins, using Glue Dots to hold everything together.
I know it's a little early for the holidays, but this crafting activity has me thinking of cooler weather as we hit 90+ temperatures and elevated humidity today!!
Have a wonderful rest of your weekend!!
Patty
Showing posts with label Shimmer Spritz. Show all posts
Saturday, July 9, 2011
Friday, July 1, 2011
My First Attempt At Welding......A Shaped Card That Is!!
Today I experimented with my Cricut Design Studio weld feature to create a shaped card. I used the birdhouse and shadow from the April Showers Cricut Cartridge to create this card. I first sized and welded the birdhouse shadow. Each shadow was 5.3X6.0inches and was cut using a beautiful wood patterned paper from the DCWV Premium Photo Stack. I also cut a second image out of black cardstock to place behind the "wood" cardstock to give the card a little extra support. Before I deleted the welded image from the Design Studio screen, I sized the birdhouse face to fit the front of the welded card. I also used the wood grained cardstock for this image. After adhering all of the images together, I embellished with a few cute blossom and butterfly stickers that I found recently at my local Dollar Tree. I then added a cute little diecut bird from DCWV. I finished the card with some ribbon trim and a bow from the Ribbon Boutique and sprayed the card lightly with some sparkle Shimmer Spritz. I left the inside blank as I think this card has numerous possibilities....birthday, housewarming, get well, etc. Hope you like my first attempt at welding!! Thanks for looking.
Patty
Patty
Wednesday, June 29, 2011
Happy Sweet 16!!
Card Exterior
Card Interior
I whipped up this little card for my neice's sweet 16 birthday. Again, I'm stuck on the beautiful doily images on the Cindy Loo Cricut cartridge. I used those on the front of this card cut at 4.5, 3.5, and 3 inches for the doily and backgrounds. I used the Wildcard cartridge to create the lettering. I was able to weld my e's together using Cricut Design Studio. I had been wanting to try to weld letters/images and this was my first easy attempt and YEAH!! it worked! The beautful paper is from Cloud 9 design and the ribbon is from Offray. I used some pearl stick-on accents from the dollar bin at Michaels. The stamped images are clear stamps from Inkadinkadoo and I used Adirondack ink in Cabin Fever to stamp the images. I finished the card by spraying it with sparkle Shimmer Spritz. The inside message is cut using a border punch from Fiskars. It includes the same stamped images as the outside of the card as well as the pearl accents. All card components are put together using regular and pop-up Glue Dots. Thanks for stopping by and have a wonderful 4th of July!!
Subscribe to:
Posts (Atom)