Showing posts with label Recollections. Show all posts

Sunday, November 6, 2011

Yeah!! My Imagine is back home.

I had to send my Cricut Imagine back to the factory a few weeks ago.  Without hassle, the company sent me a new one and it came this past week.  I was so thrilled to have the print and cut capabilities, that this machine offers, back.  I came up with this card using designs from the Lori's Garden Cricut Imagine cartridge.  I started with the precut, scalloped card.  I then embossed it using my Cuttlebug and one of my wonderful embossing folders.  From there I added some images cut from Lori's Garden, which I layered with adhesive, foam squares.  I then added some faux flowers and pearl adhesives from Recollections.  I glitzed the diecuts just a little with glitter glue.  I strung some beads from The Ribbon Boutique, added a bow from my scrap stash, and finished the card off with an antique metal brad from Making Memories.  I think I might of gotten a little carried away with all the "bling" on this card, but I think it also gives it sort of a Victorian look.  Now I just have to find the right sentiment to go inside!  Have a great week and thanks for stopping by!   Patty

Sunday, September 25, 2011

Cricut Imagine Christmas Stocking and Card Using Snow Angel

I picked up a copy of Scrapbooking magazine at Hobby Lobby yesterday.  I found a great idea posted by Kimber Jepperson using the Cricut Imagine Snow Angel cartridge.  She created large stockings from one of the designs and stitched them together to hold all kinds of goodies!!  I thought this was a great idea, so I "scrap-lifted" it and decided to create not only a stocking, but a matching card.  I cut one stocking using the fit to page feature on white cardstock.  I then flipped the image and cut another stocking also using the fit to page feature.  I used my trusty Bernina sewing machine (she's been feeling neglected lately due to my paper craft craze) to stitch the stocking together using white thread.  I reinforced the stitching on each end.  I embellished the stocking with some stick-on pearls and dried flowers from Recollections.  I added a couple of little, pink roses from Treasures by Shabby Chic.  I then created a nice matching bow from ribbon by Dashes, Dots, and Checks.  I then suspended a cute, little deer ornament from the Seasonal Shoppe from Hobby Lobby.  The embellishments were adhered to the stocking using Pop-Up Glue Dots.  I then stuffed some tissue paper into the top, but that's just until I decide to stuff it with goodies!!

The matching card was created using a pre-cut card from the dollar bin at Michael's.  I just love these tag cards. I used some glittery paper from DCWV as my background, cutting it to fit the card.   I cut my stocking at 3 inches on white cardstock from the Snow Angel Imagine cartridge.  I adhered it with Pop-Dots, again adding a little tissue paper into the top.  I used the Recollections pearls to embellish and the pink roses from Treasures by Shabby Chic.  I tied a cute little bow from the Dashes, Dots, and Checks ribbon and created a "hanger" using the same ribbon.  I created some little, pink and white pearls on the stocking using Ranger Liquid Pearls.  I think the card coordinates very nice with the stocking that will be filled with Christmas goodies for my someone special!!  Thanks for looking!!

Patty

Sunday, September 18, 2011

Using the Yudu CardShop to Create Beautiful Cards.


I got a great deal on a slightly used Yudu CardShop and got some time to practice with it today.  I used the included screened images with black ink on white cardstock to create both the birdcages and the sentiments.  I then layered the designs with white on black cardstock.  I used my Martha Stewart punches to create the borders and added some diamond and silver brads from Recollections.  The black and the silver ribbons are from the Ribbon Boutique.  The cards are put together with a combination of glue sticks and Glue Dots.  I can't wait to purchase some blank screens so that I can start screen printing my own designs on cards.  I'm not that great with ink and stamping so I think this little gadget has so much potential!  Thanks for looking!

Patty

Saturday, July 9, 2011

Card and Gift Bag Combination

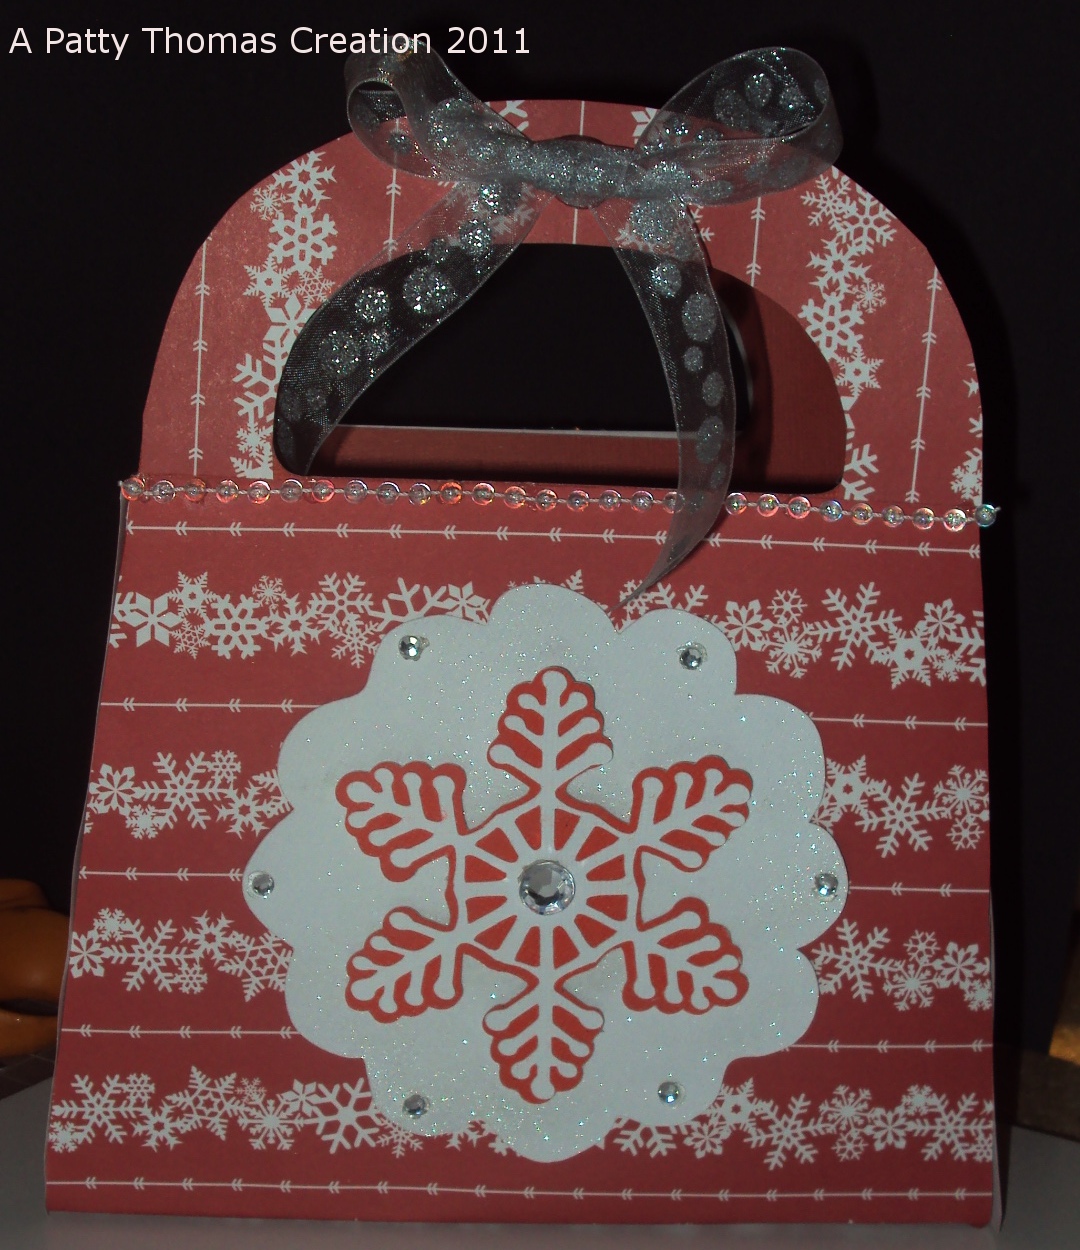
This week I've been busy working on some book reviews as part of my summer job, thus my cardmaking has gone slightly by the wayside.  Last night and today I gave my self a break and sat down with my Cricut Gypsy.  Back in the spring I took advantage of a deal to get seven free cartridges with the purchase of a Gypsy.  One of those cartridges was Tags, Bags, Boxes, and More.  I experimented last night making a couple of bags on the 12X12 mat.  I just wasn't pleased with their tiny size.  Perfect for a gift card or ring box, but not a sizeable bag.  I rustled up some 12X24 paper and went to work this morning.  The pictures show what I came up with.  Using the larger paper and mat, my gift bag is now around 7 1/2 inches wide by 6 inches tall (8 1/2 with the handle).  I found some wonderful plain "tag" cards in the dollar bin at Michael's and used one of those to create a matching card.  I really like these tag cards.  I always like to display my holiday cards and these have a prepunched hole perfect for hanging with ribbon or beads.    Okay here's my "recipe" for the bag and card:
Bag:
I used one piece of red 12X24 cardstock from The Paper Studio cut at 22.75 X 11.58 (these sizes were created on my Gypsy).  I then traced around the outside of the bag to put my snowflake pattern paper, from Recollections, in place.  This also gave the bag a little more stability.  Everything was put together using an Elmer's gluestick and Glue Dots to reinforce the bag seams. I embellished the outside by cutting a doily from the Cindyloo cartridge at 4.5 inches using white cardstock.  I sprayed the white cardstock with sparkle Sheer Shimmer Spritz.  I then cut a snowflake and background from the Winter Lace cartridge at 3.5 inches each. I added some sequins from Recollections and some bead trim and a bow.  The bead trim was from RibbonFx and the ribbon from the Ribbon Boutique.
The Card:
As I've already mentioned, the card comes from Studio G.  I adhered my snowflake patterned paper with a gluestick and then spritzed the exposed white area with sparkle Sheer Shimmer Spritz.  I used Cindyloo again to cut a doily at 2.8 inches.  Winter Lace provided me with the snowflake and background, cut at 1.8 and 2.1 inches respectively.  I then added the same theme with the bead trim, ribbon, and sequins, using Glue Dots to hold everything together. 

I know it's a little early for the holidays, but this crafting activity has me thinking of cooler weather as we hit 90+ temperatures and elevated humidity today!!
Have a wonderful rest of your weekend!!


Patty

Wednesday, April 20, 2011

A Mountain View And A Little Brown Church

I love the new Smoky Mountain-themed cardstock I found during Spring Break.  I created a card last week and I've used it in two new cards this week.  The first card is created use a wonderful, blue-patterned cardstock from Cloud 9 Design.  It is from their Cocoa Mint collection.  I cut my mountain image from the Smoky Mountain cardstock and adhered it to squares of white and black cardstock.  I then used a vellum quote from Best Occasions that matches the image perfectly.  I anchored it to the same black and white cardstock using silver brads from the Paper Studio.  I added a white ribbon bow from Hobby Lobby and finished my mountain-themed card with a couple of silver tree brads also from the Paper Studio. Everything was put together using Glue Dots (another one of my favorites!).


The second card reminds me of many of the little churches in my area. This was another image from the Smoky Mountain cardstock. I used my Cricut Spring Holiday Cards cartridge to cut the background for the image of the little church.  It is cut at 5 inches on an olive green cardstock.  I layered the image with some cream-colored scrapbook paper.  I used bronze brads from Recollections to anchor the image to a card created using a heavy, brown cardstock.  The coordinating sheer ribbon and bow are from Hobby Lobby.  I used another vellum quote from Best Occasions and anchored it to the cream-colored scrapbook paper using Glue Dots and a couple more bronze brads.  I just love how the Glue Dots are hidden by the brads.  I then embellished this card with some rustic, bronze, metal trees from Darice Rustic Accents.  These little trees were also found on my visit to the huge scrapbook store in Pigeon Forge during my Spring Break week.  Thanks for visiting!!  Have a wonderful Easter weekend!
Patty