I found these acrylic tumblers on sale at the Dollar General yesterday and bought up as many as I could. I so love using the Cricut to cut adhesive vinyl and these tumblers make great personalized gifts. I had recently purchased the Sponge Bob Cricut cartridge, but hadn't really got a chance to use it. I thought Sponge Bob might look nice on this pretty blue acrylic tumbler. I first cut out his base image using black vinyl and then cut out the corresponding layers in their respective colors. This little guy wasn't very hard to piece and layer together and actually turned out much better than I had imagined. I used my Cricut E2 and cut Sponge Bob out at 3.00 inches. I used the relative size feature for the rest of his layers. The Dollar General also had tumblers in a pretty hot pink, bright orange, and a beautiful green. Looks like I am off to cut more vinyl!! Thanks for stopping by!
Patty
Tuesday, February 21, 2012
Monday, February 20, 2012
A Card to Welcome Spring (or at least hurry it on its way!!)
After a rather mild winter, we had a miserable Sunday of cold, windy, rainy weather, changing over to snow in areas a little further north. I stayed in all day, recovering from an injured foot, and straightened my craft area. I found these beautiful flower embellishments from DCWV. I had emptied them from their packaging and had them scattered in a drawer. I recently got the Ornamental Iron cartridge from cashing in some Cricut Rewards, so I decide to try and combine the two into a beautiful, spring card. The paper for the gate is from a DCWV stack too. I was really impressed how the Cricut E2 cut the design. With all of the intricate cuts and curves I was really afraid the blade would chew up the paper. I cut the gate at 5.50 inches (I also like how the E2 saves the size of your last cut, makes for easy blogging!!). I used a prefolded card and added my gate. I then inserted my DCWV embellishments. I gently slid the sentiment die cut underneath the gate edges, to help hold it in place. I blinged up the gate with some adhesive pearls and a pretty bow. I left the inside of this card blank. I figure it would make a pretty birthday, wedding, or even thank you card. Rather simple to put together, but very pretty nonetheless. Our temperatures warm back up this week, so maybe one day, spring will decide to be here for good!! Have a great week and thanks for stopping by!!
Patty
Patty
Sunday, February 12, 2012
Shrinky Dinks Meet Cricut Imagine
Yesterday I picked up some Shrinky Dinks from my local Michael's store. They are the Shrinky Dinks especially designed for inkjet printers. I also picked up some Grafix clear Shrink Film from Joann's. I wanted to try both with my Cricut Imagine. There was quite a price difference and some noticeable differences in results. The Shrinky Dinks cost 12.99 for six sheets but then I used a 40% off coupon. The Grafix brand was 4.99 for the same quantity. I must say that I was a little more pleased with the outcome of the Shrinky Dinks. I used images from Enjoy the Seasons and Lori's Garden Imagine cartridges. I put my standard blade on 6 and did a multicut of 2. The Imagine was able to cut the material without difficulty. I did notice some differences in the printing. The Grafix took longer to dry and thus the color smeared some as the machine was cutting. I had to do some touch up with my Copic markers. The rubber wheels that hold the mat in place smeared the ink on the Shrinky Dinks with only one image. Both baked and shrunk as specified by the manufacturers for around 3-5 minutes between 250 and 300 degrees in the oven. I lined a baking sheet with wax paper for the baking process. The clear Shrink Film gave the images a stained glass appearance. The Shrinky Dinks made the images look just as if you had printed them on paper. I plan to give the Shrink Film another try, this time I will use one of the manufacturer's tips of lightly cross sanding the surface before printing. I took out my glue gun and added some pin backs to these images. I think they make delightful little pins appropriate for wear with my favorite denim shirts!! Thanks for looking!
Patty
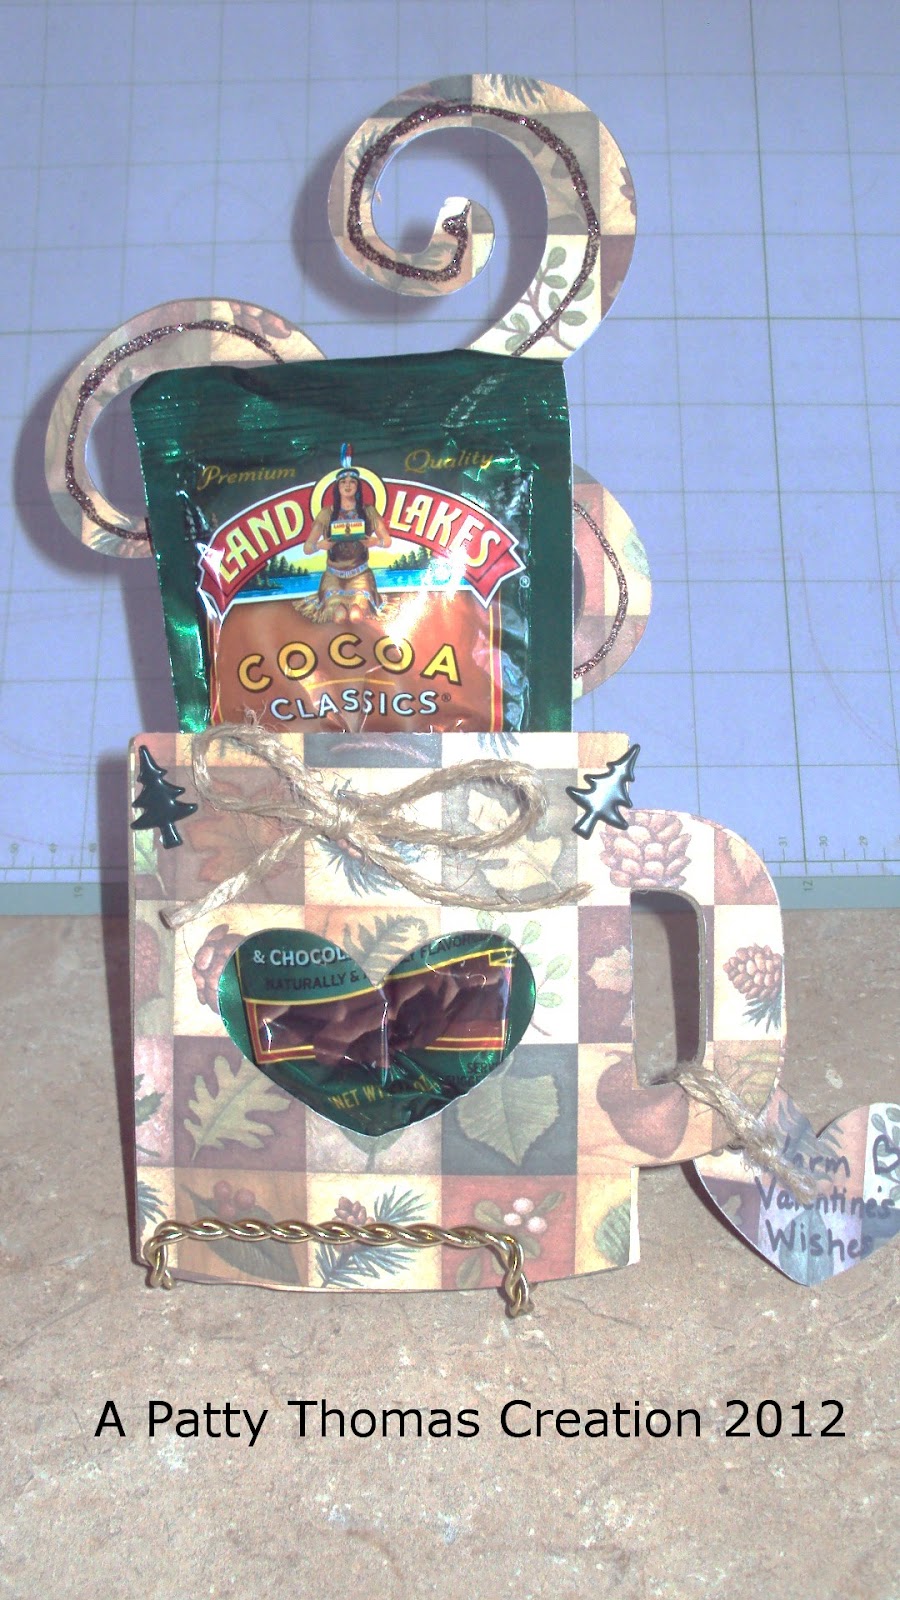
Warm Valentine Wishes Hot Cocoa Mug Cards!!
A few weeks ago I saw a post for hot cocoa mugs as Christmas favors on the Cricut Messageboard. I found this cute mug file on my Cricut Essentials cartridge, one of the built in cartridges on the Cricut Expression 2 machine. We are experiencing the coldest temperatures of the winter season right now, so I decided these warm cocoa filled cards would be appropriate for my Valentine's sweeties. The front of the mug, with the heart cut-out, and the back of the mug are cut on one mat at size 9.50. I cut two of each of these and layered them to provide strength to the card. I used my Scotch ATG gun to put them together. I added some glitter glue, coordinating brads, and a bow. I used the remaining heart cut-out to create a nice little tag, where I wrote my "Warm Valentine's Wishes" sentiment. I plan to add a few double-dipped chocolate peppermint sticks to stir up the wonderful flavors of hot cocoa. I used hearts and swirls paper from the Colorbok, Paper Studio, and the Disney Mega Paper Pads. I found some nice woodland themes, for the guys in the family, in the atd Great Outdoors stacks. Ribbon for the bows comes from jute twine, the Paper Studio, and some saved-for-me scraps from my wonderful mom, my biggest fan!! Hope you stay warm and have a very happy Valentine's day!! Thanks for stopping by!
Patty
Patty
Sunday, February 5, 2012
Floral and Lace
Today, I made a two more Valentine's Day cards. The first, I used my Cricut Expression 2 and the Elegant Cake Art Cartridge. I used some shimmery red paper from DCWV as the background and layered it with the white lace paper that I recently found on sale at Ollie's. I cut a red doily from the Elegant Cake Art cartridge and embossed it with my Cuttlebug. I also cut a lacy heart from the same cartridge and embossed it as well! I layered both on top of a small, white doily and embellished them with some pearls. I added a red ribbon and strand of shiny beads. I finished the card off with a wonderful, red bow. I think the scallped edge of the white paper looks great on this card! The second card was rather simple. While cleaning out my stash, I came across these romantic looking die-cuts from DCWV. I used paper from Colorbok and My Minds Eye. I used my Martha Stewart doily punch around the edges. I embellished with some pearls and a shimmery bow. I think this simple card looks just beautiful, perfect for Valentine's Day!! Have a great week!!
Thanks for stopping by!
Patty
Thanks for stopping by!
Patty
Wednesday, February 1, 2012
Old-Fashioned Valentine's Day Card
I think the doilies on this card give it an old-fashioned look. I used paper from Colorbok as the background for this card. I then layered some seasonal, paper doilies that I found in the cake decorating section of my local Hobby Lobby. I clipped a border from card stock from the Four Seasons stack from DCWV and layered the border with some cloth ribbon from the Paper Studio. I cut the paper doily, heart, and sentiment from my Cricut Cake Basics cartridge and embossed them with my swirly heart Cuttlebug folder. I used some paper flowers that I recently scooped up from the dollar section of my Michael's store and added a silver bead to each that I discovered in my jewelry making stash. I finished the card off with some teeny, tiny, red and white buttons. This card will be perfect for one of my sweeties on Valentine's Day!! I really like how this card turned out. I think I may have to go make some more!!
Sunday, January 29, 2012
A Quick Mickey and Minnie Valentine Using My Cricut Imagine
I haven't had my Cricut Imagine hooked up to my computer and the Cricut Craft Room since it returned from the factory. Today, I decided to take the chance and see if I could get it to print and cut. The connection is still a little faulty. Out of five prints, two of them would not cut. I like the idea of being able to color all of the layers, individually, on the Cricut cartridges and print them out on one piece of white card stock. I pulled out my Mickey and Friends cartridge and decided to test the system to make a Valentine's Day card. I placed all of my images on the mat in the online Craft Room and sent them to the Imagine to cut. The images began to print out one by one. The machine goes to cut and spits out the mat without cutting. I close out the machine, save my design and exit Craft Room. I then try to log back in and get a service error. I close everything out, turn of the machine, disconnect from the internet and try again. This time I get my saved Mickey file to load and I send it to the Imagine for cutting only. Yeah!! It worked. The images on the lowest part of the mat were off just a little bit in cutting, but this was easily fixed using my Copic markers to color the white edges. I pieced all the colored layers together using my trusty Elmer's glue stick. I then found a background design for my card using paper from the Paper Studio. I used my white Gelly Roll pen to accent the die cuts just a hint. I then used foam adhesive squares to mount all the images to the card.
I really love the whole idea of the Craft Room and the Imagine. I hope that Provo Craft can issue an update soon that removes all the "bugs" people have been experiencing with this duo. I love having the ability to move the images around on the Imagine mat with Craft Room. I also love being able to see the welding of images on a larger screen. Someday I hope to see the capabilities to combine all the layers of an image together, flood fill them with their respective colors and print and cut them with the Imagine.
Hope you have a great week and thanks for stopping by!! Patty
I really love the whole idea of the Craft Room and the Imagine. I hope that Provo Craft can issue an update soon that removes all the "bugs" people have been experiencing with this duo. I love having the ability to move the images around on the Imagine mat with Craft Room. I also love being able to see the welding of images on a larger screen. Someday I hope to see the capabilities to combine all the layers of an image together, flood fill them with their respective colors and print and cut them with the Imagine.
Hope you have a great week and thanks for stopping by!! Patty
Subscribe to:
Posts (Atom)